How To Set XAMPP To Run As-Admin By Default

Configure XAMPP Servers (Apache, PHP, MariaDB) to automatically run-as-admin.

Why run XAMPP as-admin

The XAMPP is recommended to be executed as-admin as it requires running a couple of system services such as Apache, MySQL etc. Also if you have not installed Apache or MySQL as system services, the XAMPP services may still require to access and operate custom system ports especially port 1024 and above which may again require admin access.

Hence you run XAMPP without admin privileges the XAMPP itself prompts and recommends you to run the XAMPP as-admin which you can see in the below screenshot.

blank

How to set XAMPP to run ‘as-admin’

There are two ways you can achieve running XAMPP as-admin on windows localhost :

  • Install individual XAMPP services (XAMPP, Apache, MySQL) as system services
  • Set XAMPP executable shortcut to run-as-admin

Since I don’t want to clog up my localhost with unnecessary services which I may not require frequently or always, I prefer the second option above which is to ‘set XAMPP executable shortcut to run as-admin’ rather than installing XAMPP services as system services.

Hence in this post, we will see how to set up XAMPP executable shortcut to run as-admin.

Note: This can only be set on the XAMPP shortcut file and not the actual executable

1
Locate the XAMPP shortcut files

blank

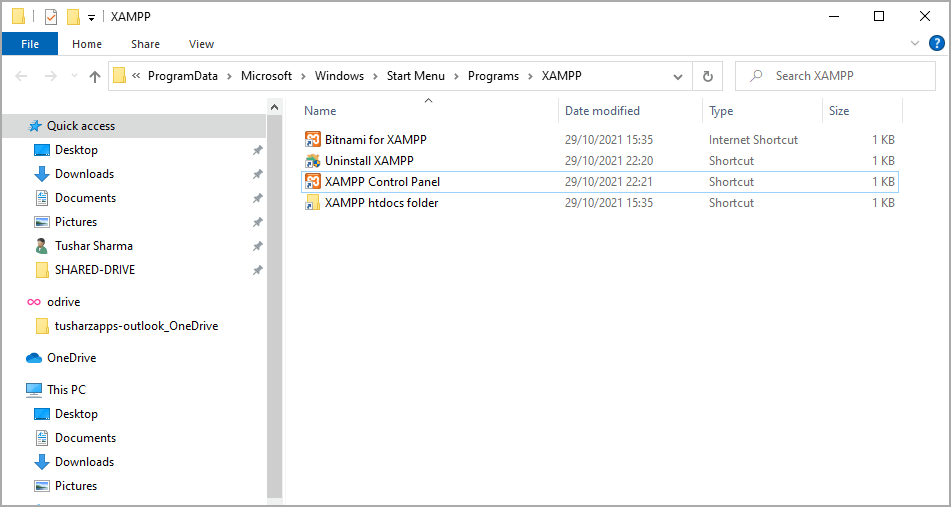
Navigate to the shortcut for launching the XAMPP. On Win10 the location for XAMPP shortcut is usually this – C:\ProgramData\Microsoft\Windows\Start Menu\Programs\XAMPP

2
Open properties for XAMPP shortcut file

blank

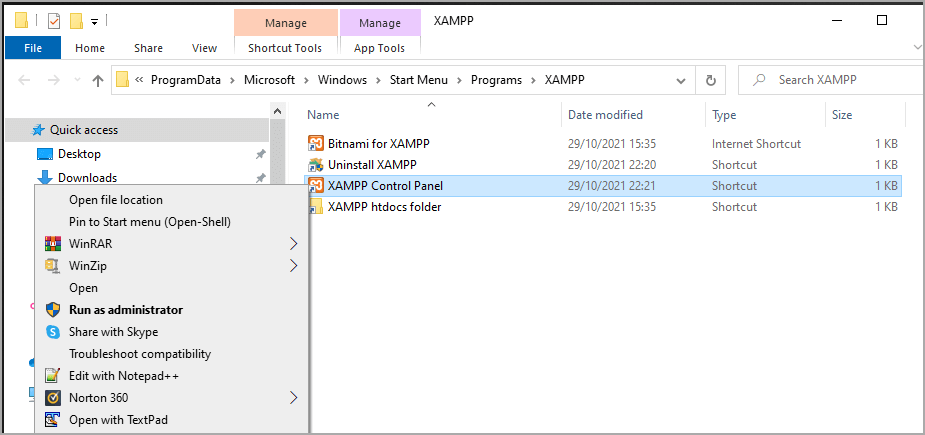
Right-click the shortcut file to open file properties

3
On properties dialog click ‘Advanced’

blank

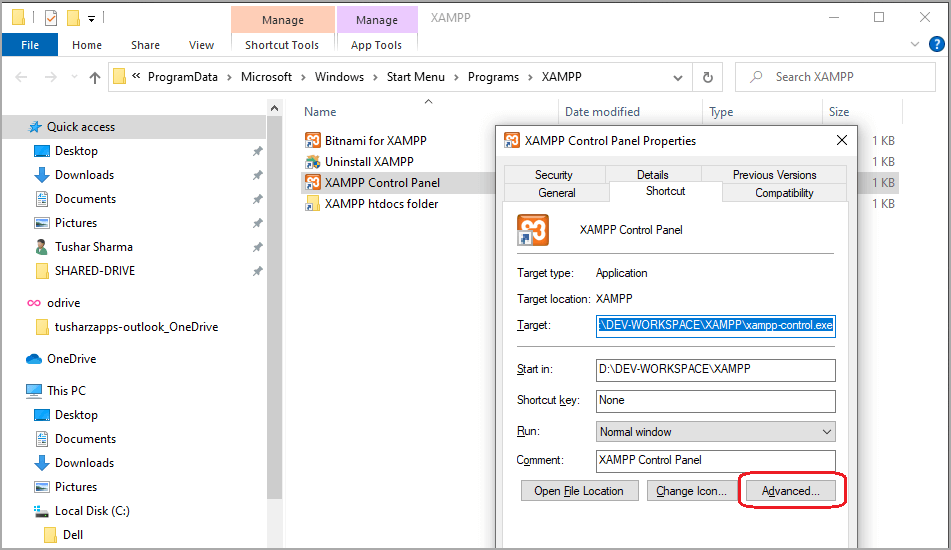
On the file property dialog box click on ‘Advanced’ to launch the advanced options.

4
Choose the option ‘Run-As Administrator’

blank

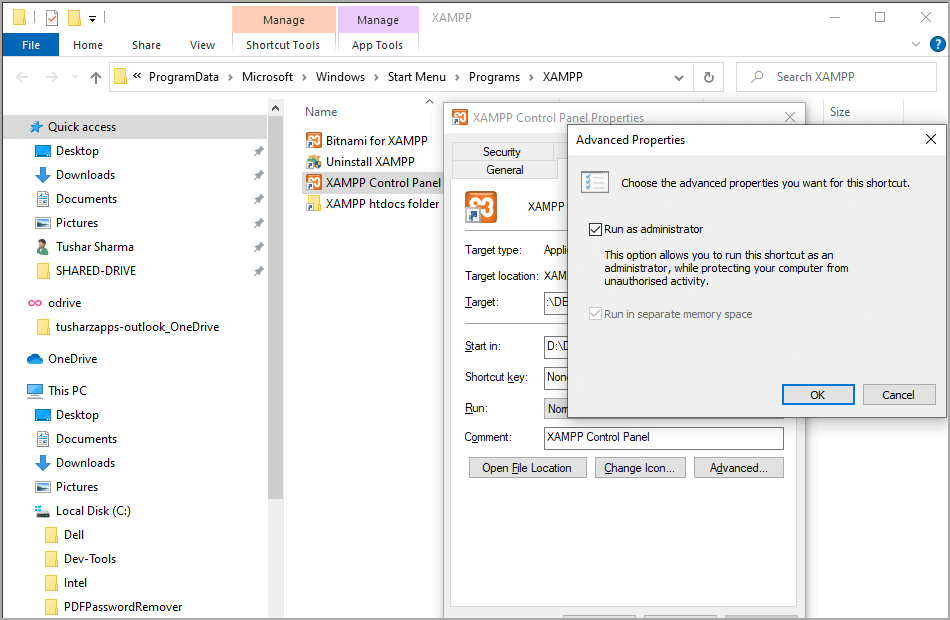
On the ‘Advanced’ file property dialog box for XAMPP shortcut, choose the option ‘Run as administrator’ and save your changes.

5
Launch XAMPP Panel and verify

blank

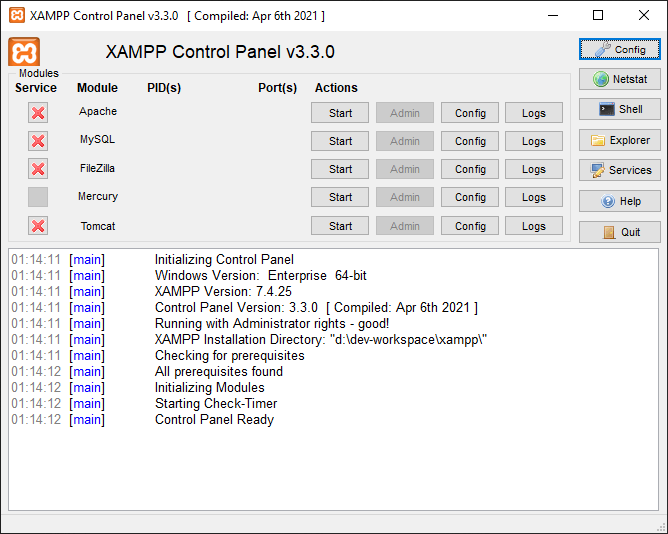
Launch your XAMPP Control Panel, you should see the above control panel.

As you can see there is no warning or recommendation for launching the XAMPP as administrator this time on the panel logs. This means the XAMPP is now launched as administrator.

You can also verify the same via Windows ‘Task Manager’. As you can see in the screenshot, the XAMPP process is running with ‘Elevated’ privileges it means that it is running as-administrator.

blank
Tushar Sharma
Tushar Sharmahttps://www.automationdojos.com
Hi! This is Tushar, the author of 'Automation Dojos'. A passionate IT professional with a big appetite for learning, I enjoy technical content creation and curation. Hope you are having a good time! Don't forget to subscribe and stay in touch. Wishing you happy learning!

1 COMMENT

  1. Thank You! Thank You! Thank You!

    So clear, easy to understand, easy to follow and everything so well explained/covered

LEAVE A REPLY

Please enter your comment!
Please enter your name here

This site uses Akismet to reduce spam. Learn how your comment data is processed.

Recent Posts

RELATED POSTS

How To Change Apache Http & SSL Ports in XAMPP

Why change Apache Port By Default, Apache runs HTTP on port 80 and SSL on port 443 in XAMPP. Generally, you may need to change...

Why WordPress Installation Ends Up with latest version?

1. Why You Need Older WordPress Versions Of course, running the latest version of WordPress is the best option for any website, but at times,...

How To Install XAMPP on Windows

What is XAMPP The full form of XAMPP stands for Cross-platform, Apache, MariaDB (MySQL), PHP and Perl. It is one of the simplest and lightweight...

How To Configure Virtual Hosts in XAMPP

Apache has made it very easy to have multiple websites or web applications running on the same physical server, and access each using a...

Â

RECENT 'HOW-TO'

How To Install Oh-My-Posh On Windows PowerShell

Oh-My-Posh is a powerful custom prompt engine for any shell that has the ability to adjust the prompt string with a function or variable. It does not...

MORE ON CODEX

FEATURED PROJECTS

SEPA Bulk File Generator and Validator

ADjo LABS PROJECT: SEPA Bulk File Generator and Validator. Supported File Types PAIN008, PAIN001, PACS003 and PACS008. Tested for supporting PAIN.008.001.001 and PAIN.008.001.002 (version 1&2). The XML...

MORE IN THIS CATEGORY

How To Change Apache Http & SSL Ports in XAMPP

Why change Apache Port By Default, Apache runs HTTP on port 80 and SSL on port 443 in XAMPP. Generally, you may need to change...

How to View Java API Doc Hints within IntelliJ

IntelliJ Quick Documentation So how do you generally refer your Java API Doc? If you use Google or online Java API Doc or even a...

How To Do API Testing with JMeter

Introduction Application Programming Interface is a very popular term among developers. It is simply a request provider that responds to your request. In other words,...

How To Create Dashboards with Jira

What is a Jira Dashboard? The Jira dashboard is like a control panel for your projects. You can create several dashboards for each project you...

CHECKOUT TUTORIALS

Java Tutorial #3 – Java Arrays

Table of Contents One Dimensional Array Declaring Array Allocting Memory to Array Accessing Array Elements Initializing Array Length of Array Multi Dimensional Array Creating 3...
- Advertisement -spot_img